Jump to content
  • Welcome to 205GTIDrivers.com!

    Hello dear visitor! Feel free to browse but we invite you to register completely free of charge in order to enjoy the full functionality of the website.

Sign in to follow this  
dicky20014

[car_upgrade] My Dream 205 - Mi16 On Bodies

Recommended Posts

dicky20014

Hi all,


Well you may of seen me popping up in the for sale section buying a number of parts / cars etc the last couple of months. I went away from 205s (got myself a dc2 itr) but it wasnt the same! So I'm back to what I know (sort of!) and love. Though this time Ive got enough money and (hopefully) experience to build what for me is my dream 205:


rebuilt mi16 on throttle bodies circa 190bhp with a good torque figure to match, 150lbish +

a 'reasonable' looking engine bay (tidyish wiring etc)

mint shell, either miami blue or lazer green

309 rear beam

uprated bilstein suspension with eibach springs

standard exteroir bar a slight 'twist' on the 1.9 alloys

Generally new or near new parts for reliability....a peugeot can be reliable!...I hope

Share this post


Link to post
Share on other sites
Richie

Sounds good. Look forward to seeing some updates. May I ask what you disliked about the dc2?

  • Like 1

Share this post


Link to post
Share on other sites
dicky20014

So I set about looking on the forum and pistonheads for the engine to start with. Ideally I wanted the engine to be already built as I didnt really have to funds to build the engine and afford to do everything else I wanted, kind of the easy way out I know but with 4 - 5k total build price, you cant have everything!


I found what I was looking for thanks to craig_007 who was selling his whole car - fully rebuilt mi16 on colin satchell bodies with emerald ecu, peter t cams. It looked like he had spent alot of time and effort getting the engine to that spec with various trials including jenvey bodies, and a fair lump of time spent on the rolling road. The engine was kicking out a healthy 195bhp and 165lb of torque....perfect.


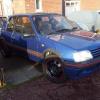
After a good few phone calls to craig, I made the long 4 1/2 hour journey up to scotland to view the car, drove really well and after a compression test decided it was the one for me:


205No9.jpg

Share this post


Link to post
Share on other sites
dicky20014

Hi Richie, I did like the car, its just so different from a 205, very low torque under vtec, then brutal in vtec. Was really nice though, and handled amazingly, just missed the 205s really, sad I know! Heres a picture of it anyway, bit of dc2 porn!


426658_10150674199167387_524427386_11751081_370706157_n.jpg

  • Like 1

Share this post


Link to post
Share on other sites
dicky20014

So got the car safely home and had a few blasts around in it (very quick!) until I found the next step in the plan.......A mint miami blue shell courtesey of chris_mi.


Main problem being it was in birmingham and I was in cumbria and since this one had no engine in, it was a little trickier to get up here! Had to pay to get it couriered up here in the end as my friends van that he used to tow his car trailer had failed its mot badly so couldnt go down to collect it, sods law! Anyway, finally got it up here.....post-9558-0-31352100-1335630825_thumb.jpgpost-9558-0-73236700-1335631008_thumb.jpg

Share this post


Link to post
Share on other sites
dicky20014

In its new home for now, the shell is really clean, just a few dings that I will get pulled out, also has had its engine bay proffesionally resprayed which encourages me to make it a nice neat install :)post-9558-0-54107400-1335631195_thumb.jpg

Share this post


Link to post
Share on other sites
dicky20014
post-9558-0-41101200-1335631346_thumb.jpg

Share this post


Link to post
Share on other sites
GLPoomobile

Hi. Can I ask what you intend to do with the white shell? F323 was my first GTI (I was one of the first of the many, many owners it's had over the years). I'd be sad to see it end up scrapped. I did actually go and see Craig just about a week or two before you bought it, as I felt like it was fate calling, but I had to walk away as it would have ended being another project and I'm bad enough with one 205 :blush:

Share this post


Link to post
Share on other sites
davepug205

I cant belive your even thinking of pulling that white one to bits! :o

  • Like 2

Share this post


Link to post
Share on other sites
BlueBolt

I cant belive your even thinking of pulling that white one to bits! :o


I can!! Miami all the way!!! :)

  • Like 1

Share this post


Link to post
Share on other sites
base-1

I cant belive your even thinking of pulling that white one to bits! :o


Agreed. If I was going this route, I'd use the running gear off the Miami and buy a spare cheap engine and gearbox from breakers to keep the white one alive.

Share this post


Link to post
Share on other sites
GLPoomobile

I cant belive your even thinking of pulling that white one to bits! :o


To be fair, it looks a heck of a lot better in the photos. And that's no disrespect to Craig either, as it is (or rather, was) tons better than it was a few years ago when I saw it last. But over the years and the various owners it's been very much a track slag, so would need quite a bit done to make it a comfortable road car (which is why I passed it up).

Share this post


Link to post
Share on other sites
dicky20014

I never planned on scrapping the white shell, I'd hate to see a gti in the breakers, I was simply going to put all the spare bits, shell running gear etc that i didnt need on the for sale section on the forum. As GLP says, the white shell is pretty tatty now, no disrepect to craig at all, this was how he decribed it to me over the phone. Would make an excellent track car though so hopefully someone on here will be able to make use of it

  • Like 1

Share this post


Link to post
Share on other sites
base-1

So this could be two build threads in one..... nice!

Share this post


Link to post
Share on other sites
dicky20014

Then started stripping the white one down ready to take the engine out


post-9558-0-13972600-1335730776_thumb.jpg

  • Like 1

Share this post


Link to post
Share on other sites
dicky20014
post-9558-0-52624500-1335731103_thumb.jpg

Share this post


Link to post
Share on other sites
dicky20014
post-9558-0-64624800-1335731180_thumb.jpg
  • Like 1

Share this post


Link to post
Share on other sites
dicky20014

Out she comes! yes it was dark by the time I got it out :P


post-9558-0-77132600-1335731420_thumb.jpg

Share this post


Link to post
Share on other sites
dicky20014

Looking rather empty now!


post-9558-0-30459200-1335731558_thumb.jpg

Share this post


Link to post
Share on other sites
dicky20014

Bit of an update really, thought whilst I had the engine out I might aswell give it a clean and a lick of paint since the engine bay it was going into was in such good condition. Started with the rocker cover which came up quite nicely


post-9558-0-06152800-1337199120_thumb.jpg

Share this post


Link to post
Share on other sites
dicky20014

Was feeling adventurous with the red paint so thought I'd have a go at the strut brace too


post-9558-0-27032200-1337199257_thumb.jpg

Share this post


Link to post
Share on other sites
dicky20014

Time to clean and paint the engine. For those who havent done this before, it takes ALOT longer than you think, its really quite hard / annoying to get into all the casting etc, and clean out the 15 odd years of crud in there! Then you paint one bit ie the main block, and the mounts look worse, paint the mounts and the gear / clutch linkages etc look worse, so i ended up painting alot more than I was expecting to, but on the plus side, it does look half reasonable now :)


Before


post-9558-0-34398200-1337200022_thumb.jpg

Edited by dicky20014

Share this post


Link to post
Share on other sites
dicky20014

After painting the main block (this took ages)


post-9558-0-10768400-1337200169_thumb.jpg

Share this post


Link to post
Share on other sites
dicky20014

painted up the exhaust manifold, knew this line was useful for something :P

post-9558-0-32753900-1337200438_thumb.jpg

Share this post


Link to post
Share on other sites
dicky20014

Kind of forgot to take photo's inbetween this and everything else I painted on it, but after painting, I gently put the engine in the new shell, trying to scratch as little as possible! I managed to get the spreader bar for the engine crane to do this bit, can not stress *how much* easier this is compared to not using the spreader bar!


post-9558-0-43632800-1337200771_thumb.jpg

Share this post


Link to post
Share on other sites

Create an account or sign in to comment

You need to be a member in order to leave a comment

Create an account

Sign up for a new account in our community. It's easy!

Register a new account

Sign in

Already have an account? Sign in here.

Sign In Now
Sign in to follow this  

×